Color Rules
DRAFT This page is not complete.
This section describes how to manage the color rules.
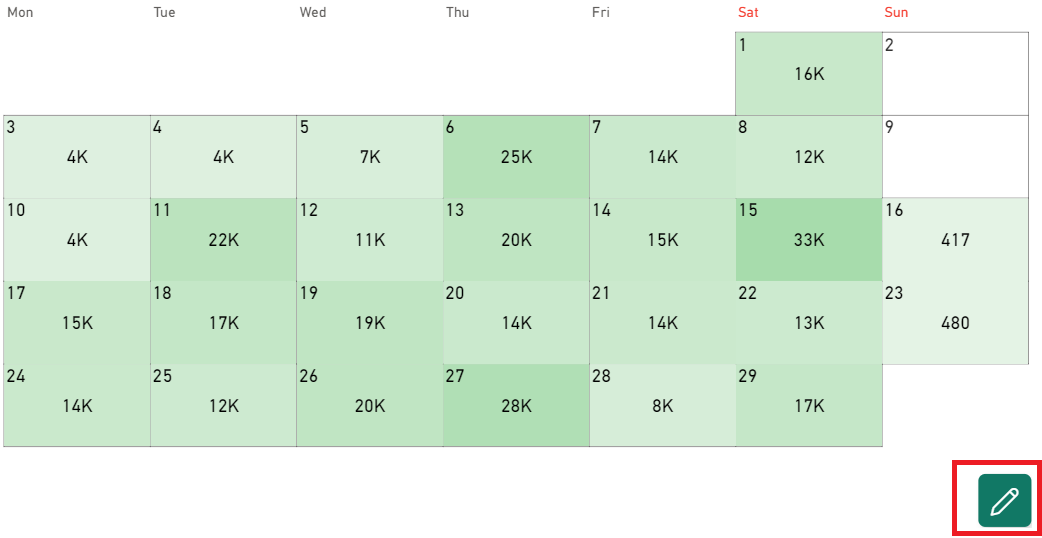
To manage the color rules, click on the editing button in the UI:
Managing color rules: rules types
The first applied color rule is partially locked and can not allow you the maximum personalization.
So, to manage color rules, you need to add a new rule by clicking on Add rule.
Calendar Pro allows you to select among two different types of rules:
- One based on conditions.
- One based on the color scale.
Conditional rules
In the cases you want to display a color for a particular value, you can use the conditional rule.
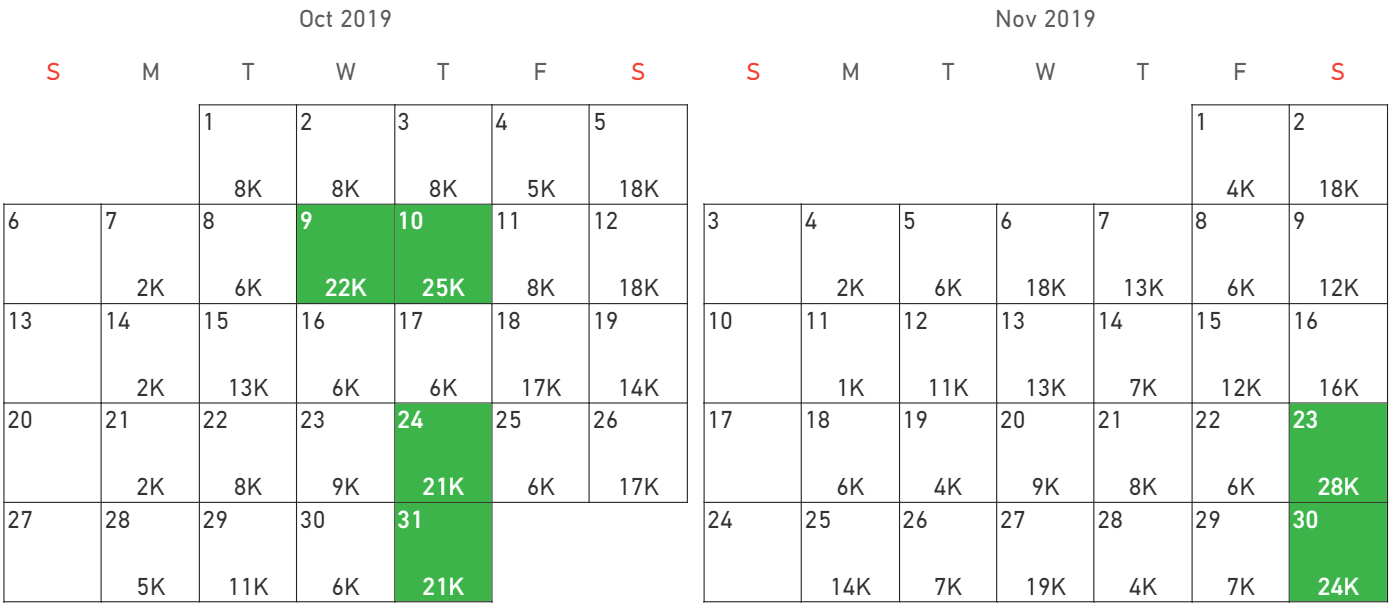
For example, suppose you want to color the cells that present a sales amount greater than 20k. You can impose a condition like the following:

And the result is:
Color scale rules
The color scale rule allows for different levels of customization.
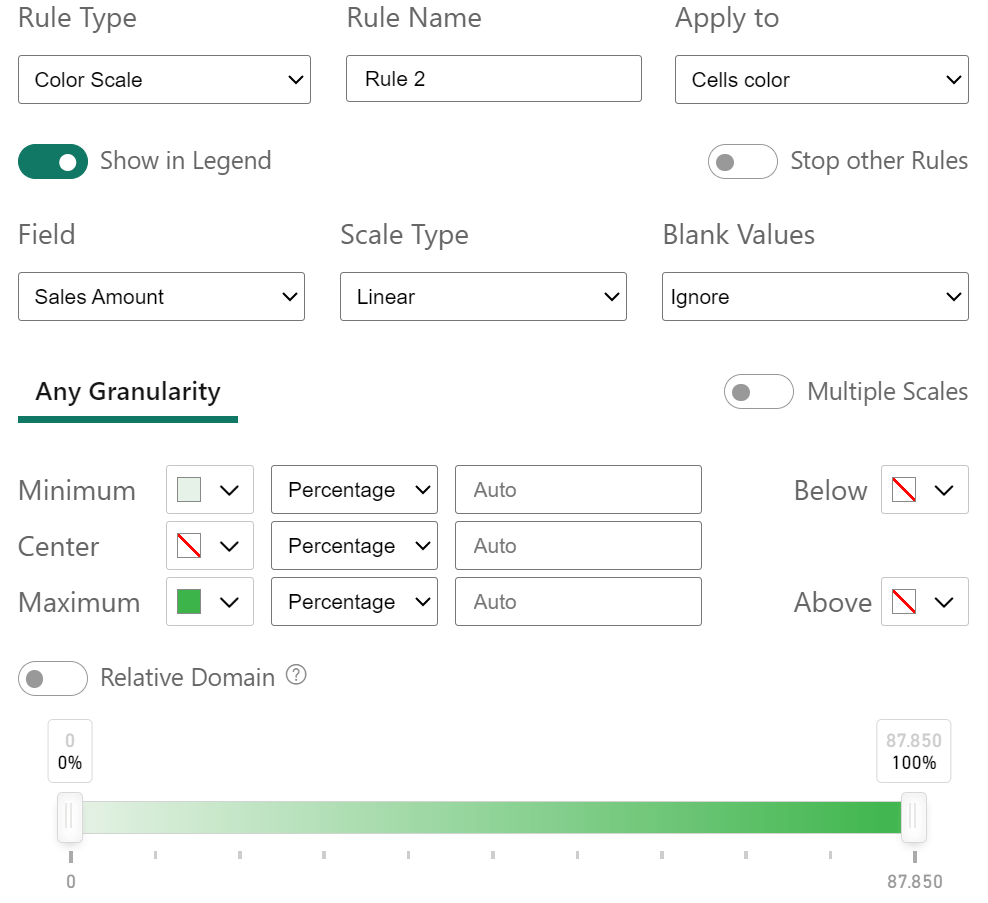
First of all, you can choose your preferences on:
- Scale Type. This option allows you to choose between Linear or Logarithmic. This parameter manages how the colors change during the transitions among one another, by using a linear or logarithmic logic.
- Blank Values. This option allows you to:
- Ignore the blank values.
- Treat them as if their value was zero (Treat As Zero). In this case, the color will be the one associated with the value zero.
- To set a color of your choice for the blank values (Set Color).
By enabling the Multiple Scales toggle, you can change the colors and their transition among colors at different granularity. In other words, you can set custom rules that differentiate the colors and their transitions for daily, monthly, weekly, quarterly, or yearly aggregations.
If the toggle is not enabled, Calendar Pro will apply the same rule to all the granularities.
You can manage the transition among the colors to associated values by changing the options for Minimum, Center, and Maximum as follows:
- Percentage. The transition among colors can be at a certain percentage. This can be set by inserting a value in the dedicated box or by moving the percentage bar at the bottom.
- Value. In this case, the transition can be set at precise values, instead of on a percentage base.
- Field. If you need to display different fields, any field, in this case, will be colored with different colors.
Check this - Calculation. In this case, you can set the transition of color based on calculation, using different mathematical operators.
The Below and Above options allow you to visualize the transition among values with certain colors. Then, below or above certain values (or percentages) the cells can be colored differently. This will enlighten values in a certain range.
Every option allows for the possibility to use the transparent: this adds a further possibility for personalization and customization, allowing multiple rules visible.
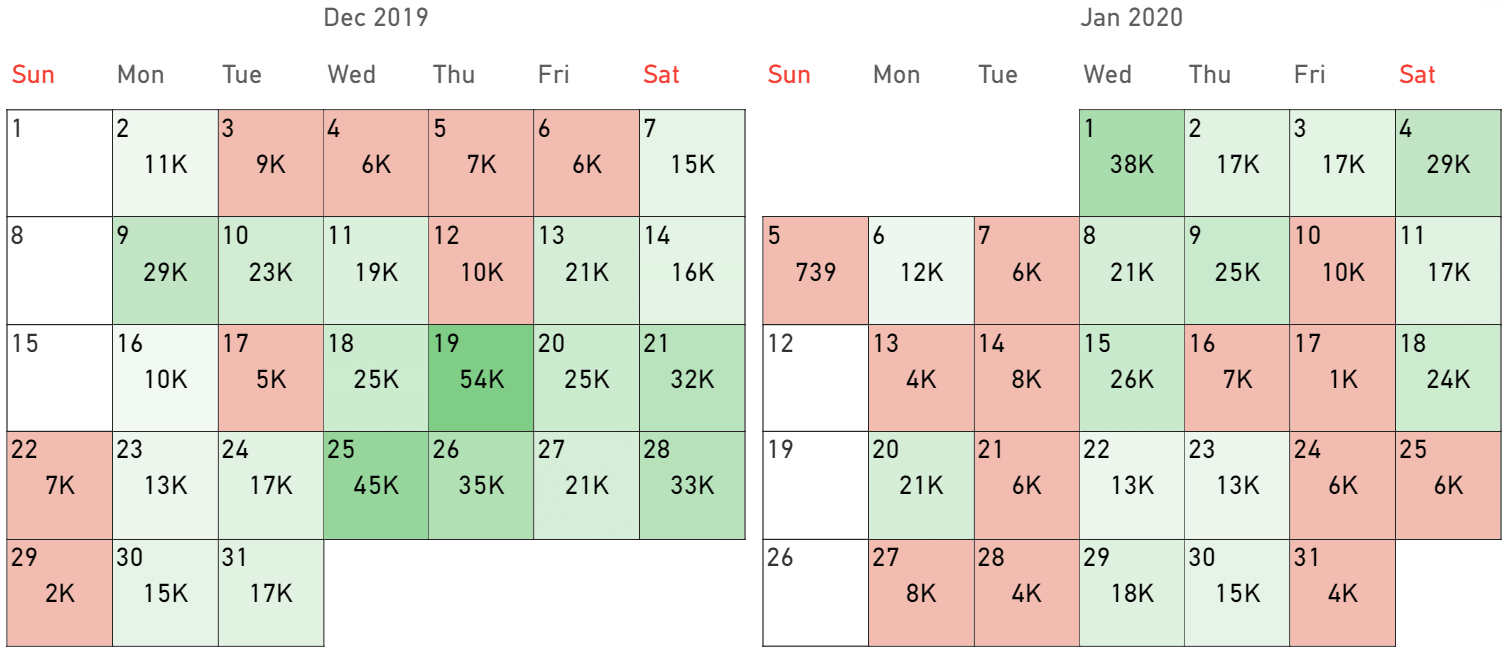
For example, consider the following rule:
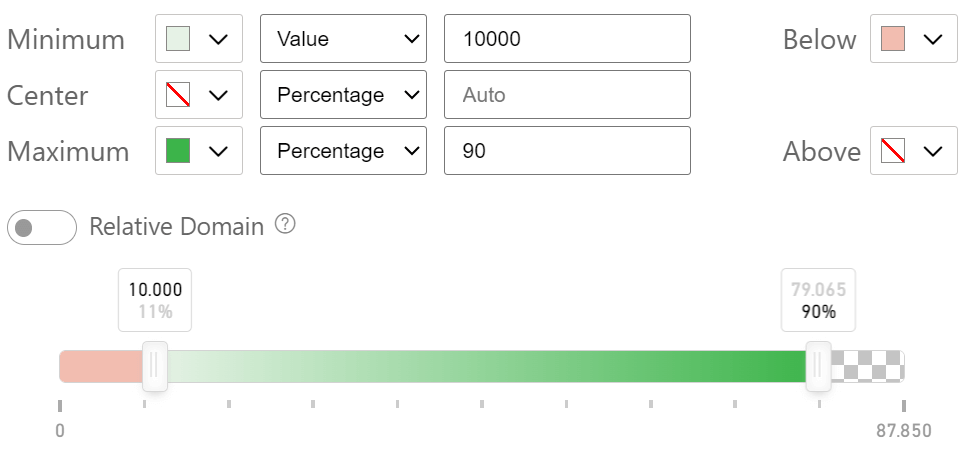
This results in:
NOTE: The use of the Value or Percentage parameters can be mixed together at will.
Finally, by enabling the Relative Domain toggle, Calendar Pro considers the first data point of the column as the starting point.
If not enabled, Calendar Pro considers 0 as the starting point in case of positive numbers. In the case of negative numbers, 0 is the highest value.