Slicing
There are two types of visuals in Power BI: those that highlight data on user interaction, and those that filter out other visuals in reports; these are called Slicers. Put in other words, slicers are visuals than act like the Filters pane of your report.

One of the peculiarities of the slicers is that they can be filtered only by other slicers, also if you try to manually change their interactivity. Also, when you apply a filter on a slicer, this is somewhat permanent until you remove the filter, as opposed to normal visuals which can be easily reverted from other visuals.
Smart Filter Pro is slicer.
Sync Slicers
Sync Slicers is a feature of Power BI that allows you to apply the filter of a slicer placed on a single page to other pages of the same report. Smart Filter Pro supports this feature as well.
To use Sync Slicers, you can follow these steps:
- Show the Sync Slicers pane:
- In Power BI Desktop click on the View ribbon, then select Sync slicers.
- In Power BI Service, click on the View menu, then enable the Sync slicers pane.
-
Select the visual on the canvas and set the options in the Sync Slicers pane to obtain the result you want.
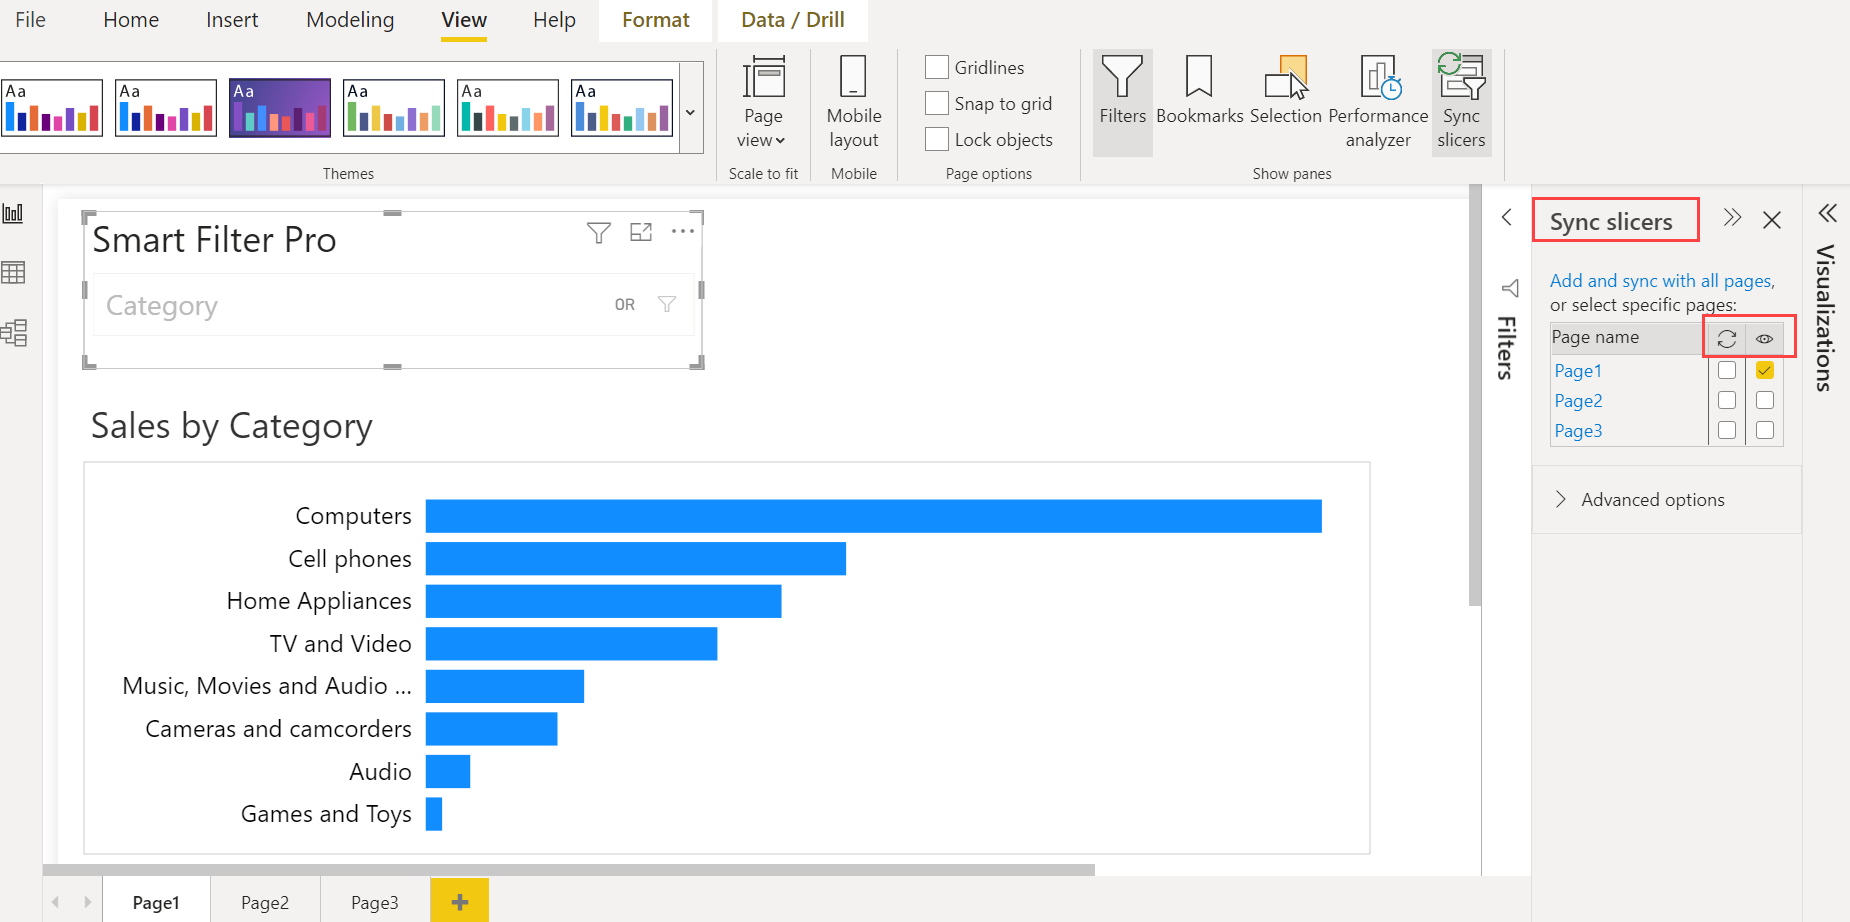
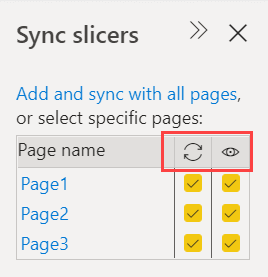
The two columns in the pane are:
-
Synchronization: This allows you to choose the pages where to apply the filter of the slicer.
-
Visibility: This allows you to choose where to place the slicer visual. This means that if you manually draw the visual on a single page, you can duplicate it on different pages automatically by using this option.
For instance, suppose that you have a report with three pages; one page contains Smart Filter Pro with the category Computers selected and you want to replicate this filter on the other pages too. To do so, you just need to select both the columns on every line of the Sync Slicers pane and the filter will be spread across the report.
Find out more information here: Sync and use slicers on other pages